With HubSpot Workflows, you can automate certain actions (e.g. sending messages) based on HubSpot triggers that you define (e.g. when a contact moves to a different stage, an email is opened, or something else).
Supported actions:
- Send a WhatsApp template message
- Send a proactive WhatsApp bot flow
How to create workflows on HubSpot
- On HubSpot, click Automations → Workflows → Create workflow.
You can create a workflow from scratch or use a HubSpot template. In this guide we will create a workflow from scratch. To learn more about HubSpot workfow templates, please read this article.
- Click From scratch. Decide the type of the trigger for your workflow (for example, contact-based) and how you want the workflow to start (for example, blank). Click Next.
Set up triggers
Choose criteria that will trigger your workflow. In this example, the trigger is when the Contact priority is “High”. Learn more about setting enrollment triggers in workflows in this HubSpot guide.
- Click Set up triggers.
- Choose your trigger. For example, when the Contact priority is “High”.
- Click Save. The trigger is created.
Add actions
At this step you can add one or multiple Rasayel Actions
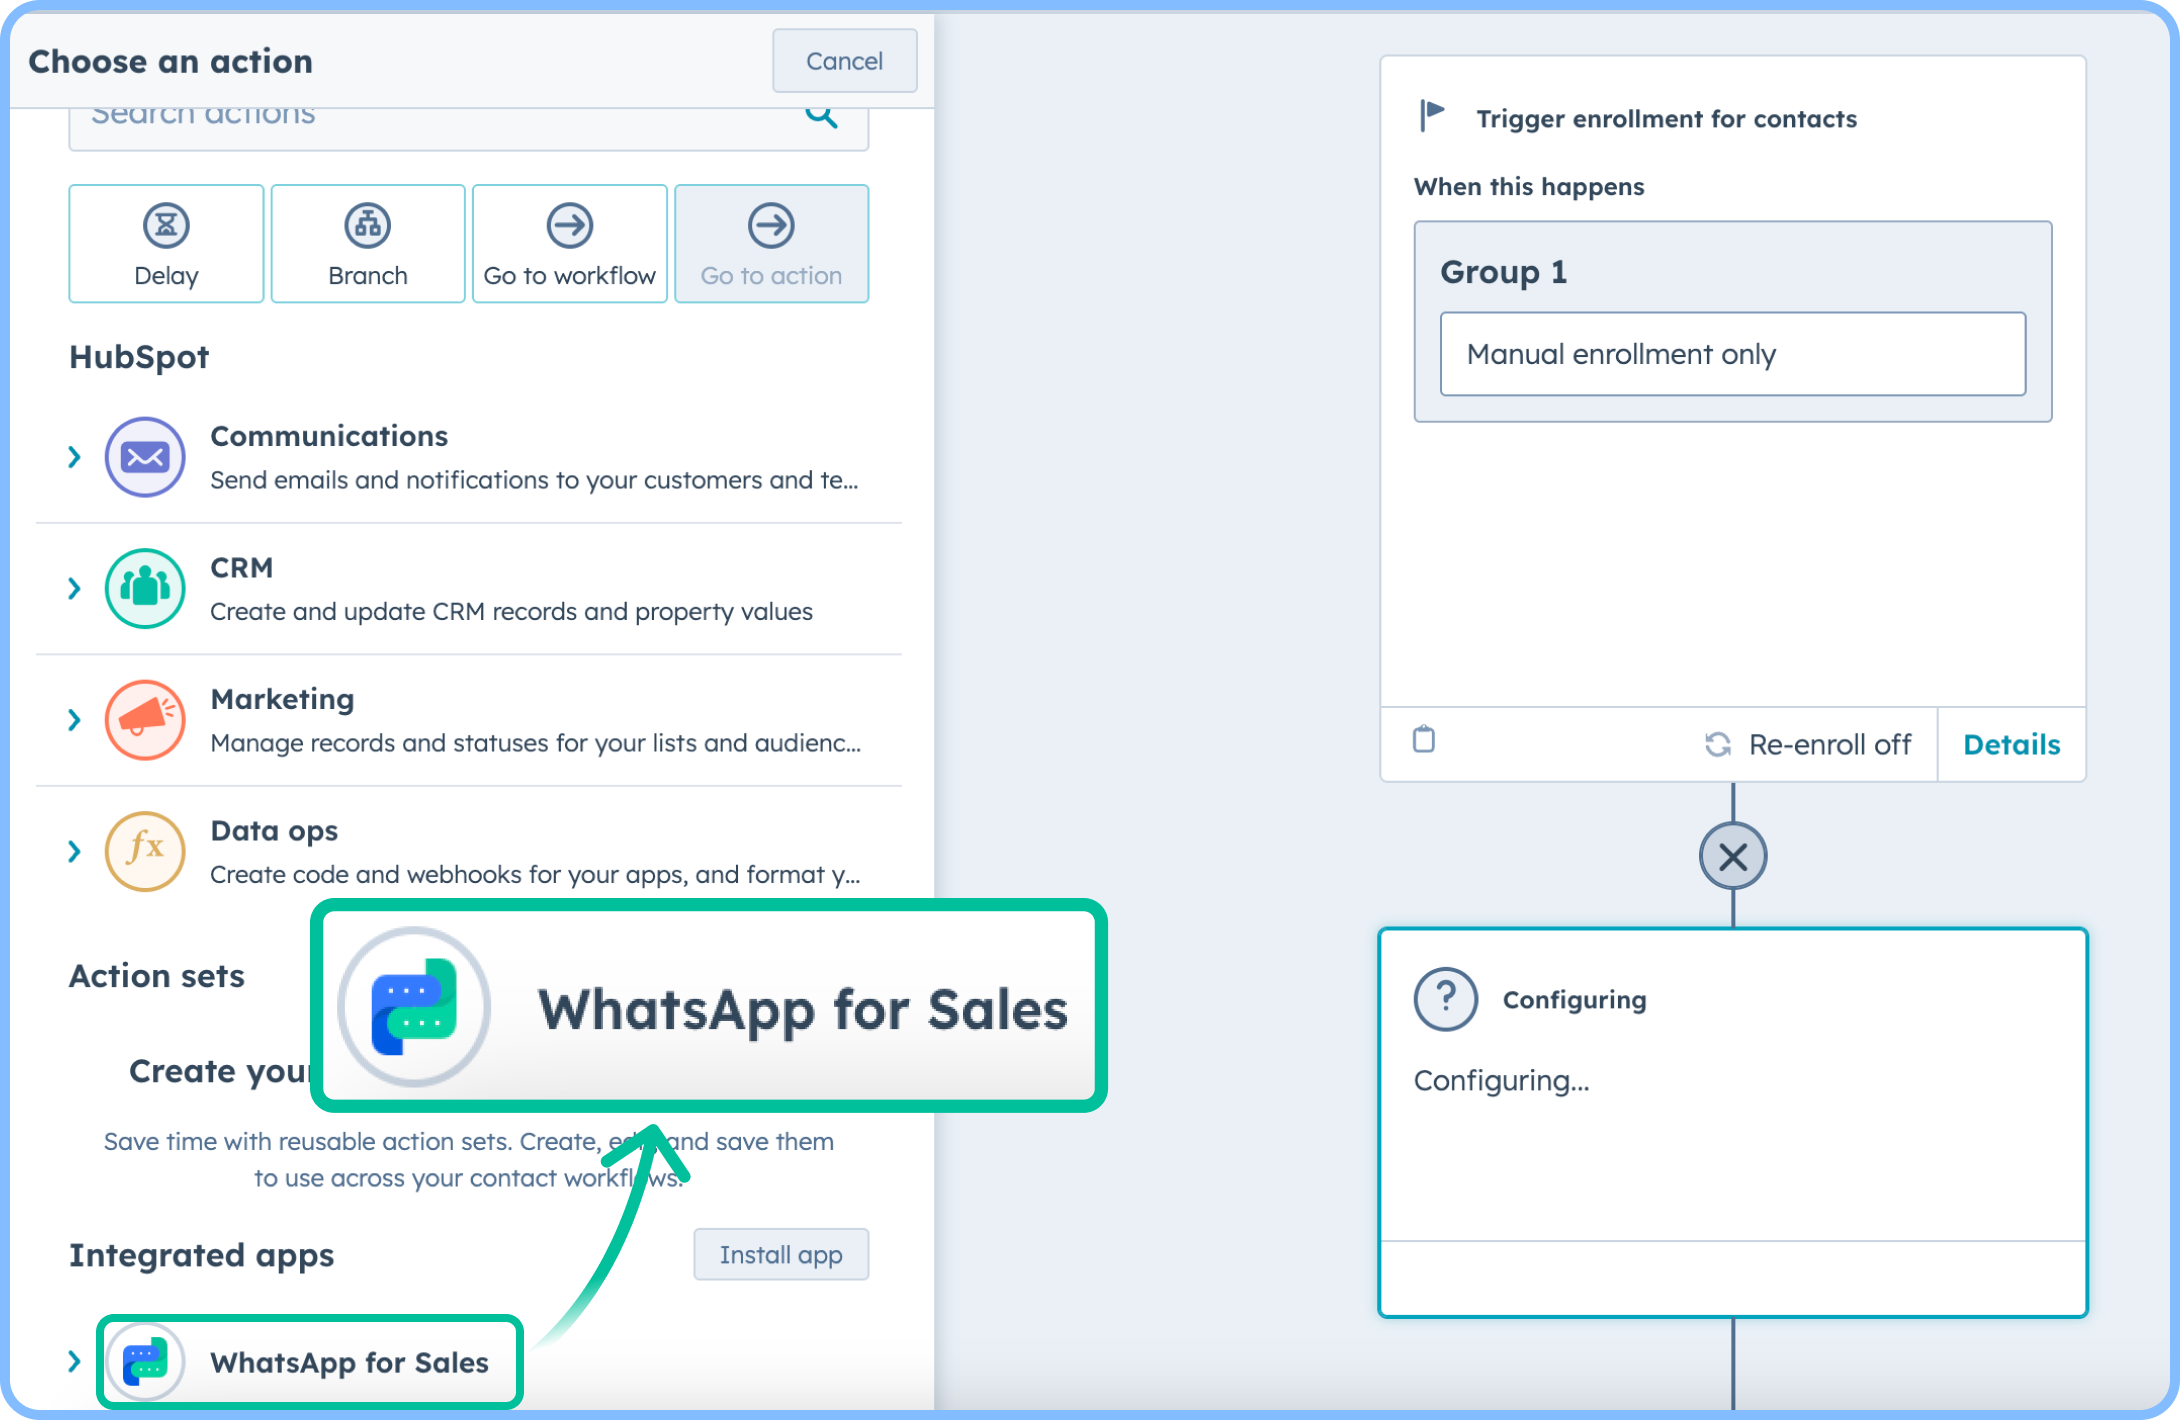
- Click the + plus icon.
- In the left panel, select WhatsApp for sales.
- Choose from
- Send a WhatsApp message and assign conversation to send a single message
- Send a proactive bot template message to send a WhatsApp bot flow
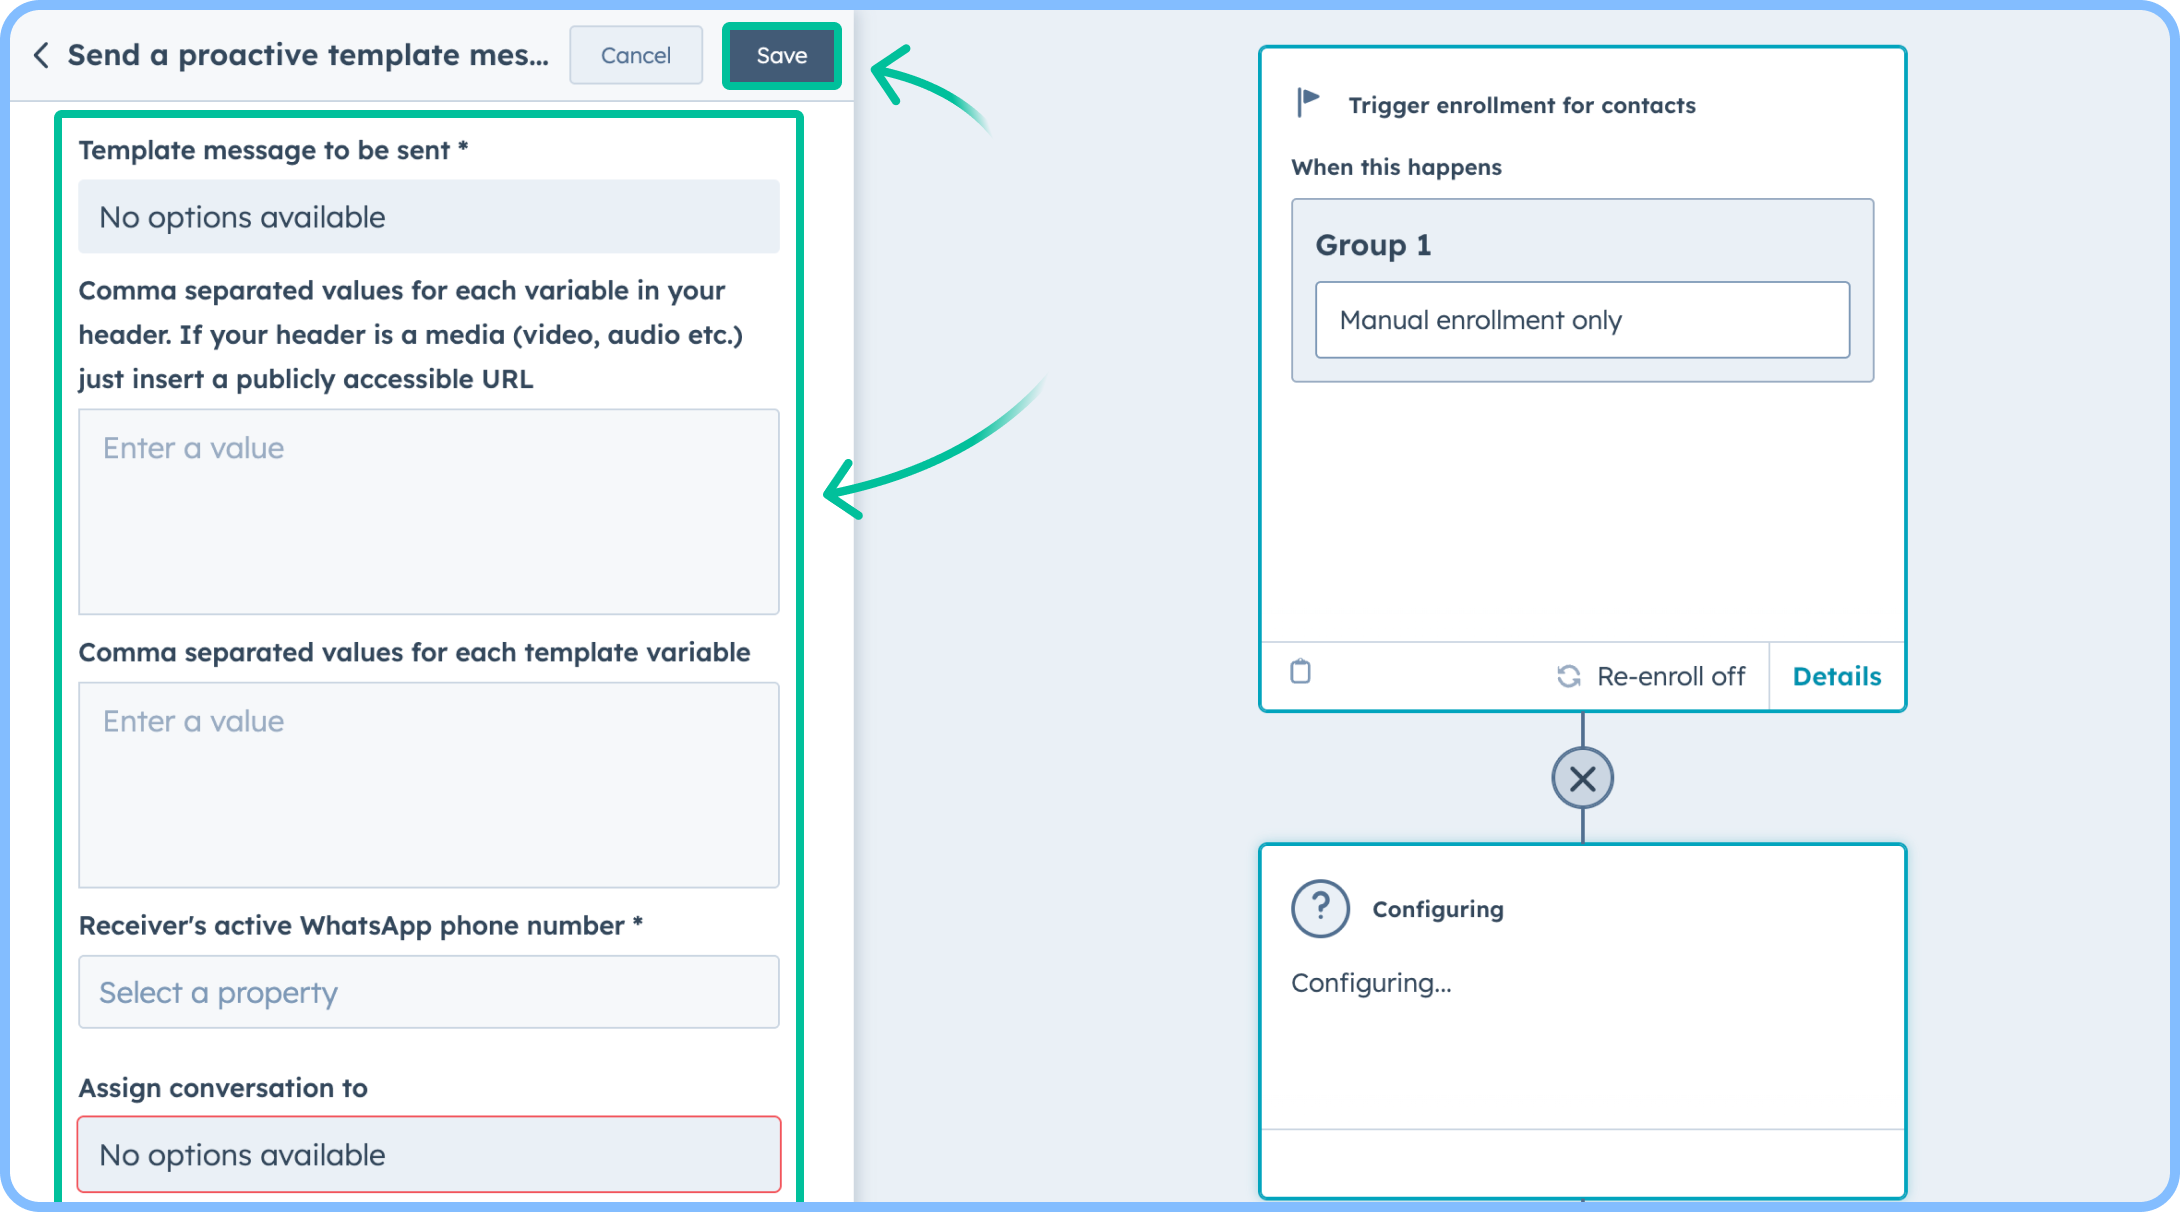
- Under “Channel to send message with”, choose a WhatsApp channel.
- Under “Template message to be sent”, select a WhatsApp template.
- If the template has variables, add “values” for each variable. To see if the template has variables, hover the mouse around the template. You will see the full content of the template and the variables. You can add values for the variables manually or choose from your HubSpot Contact tokens. If there are more than one variables, add the values with comma separating them.
- Under “Receiver’s active WhatsApp phone number”, select Mobile Phone Number.
- Under “Assign conversation to”, select a team or a user to assign the conversation to after sending the template.
- Click Save.
You must have already created your message template and bot flow in advance and have them approved by Meta. Read Message Templates for information about creating and submitting a template to Meta. Read How to create a proactive chatbot for information about bot flow creation.
Turn on the workflow
Here, you set your workflow live.
- Click Review and Publish.
- Choose whether you want your existing contact or the contacts after the workflow is live to be enrolled in the workflow.
- Click turn on workflow to set it live.