
Settings
- From the Campaigns page, click on New campaign.
- Pick the WhatsApp number and give the campaign a meaningful name so that you can find it again later.
- Define advanced settings that can alter the behavior of the campaign.
- Trigger existing chatbots on reply - When this is disabled, if you have any live bots, they will not engage with users on the user’s first reply after the campaign was sent.
- Assign to a specific owner - If you have the HubSpot integration installed, you will see this option. This allows you to assign conversations to the relevant owners in HubSpot or to a specific owner when the targeted users reply to the conversation.
- Assign to a specific team - With this option, you can assign a conversation to a specific team when a user replies to a campaign message
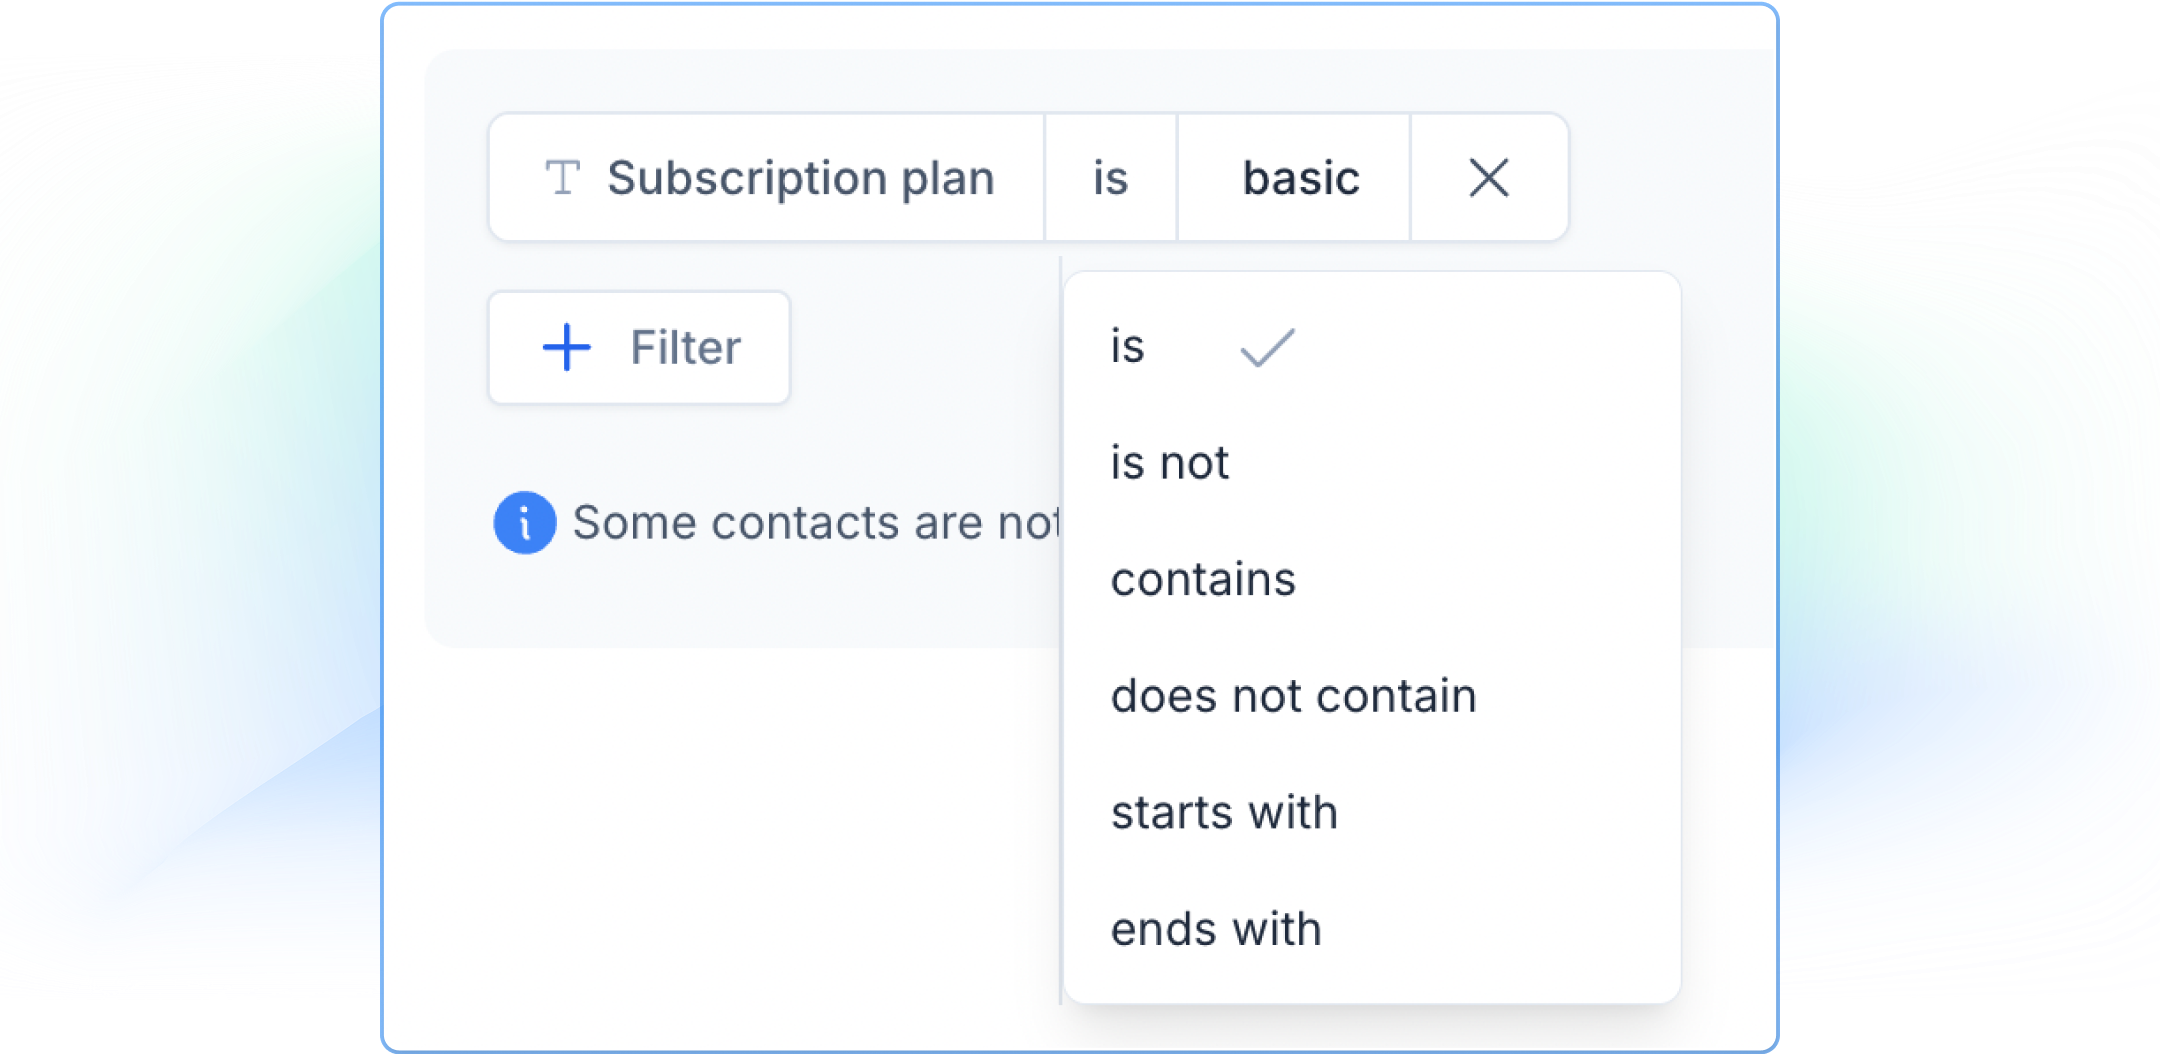
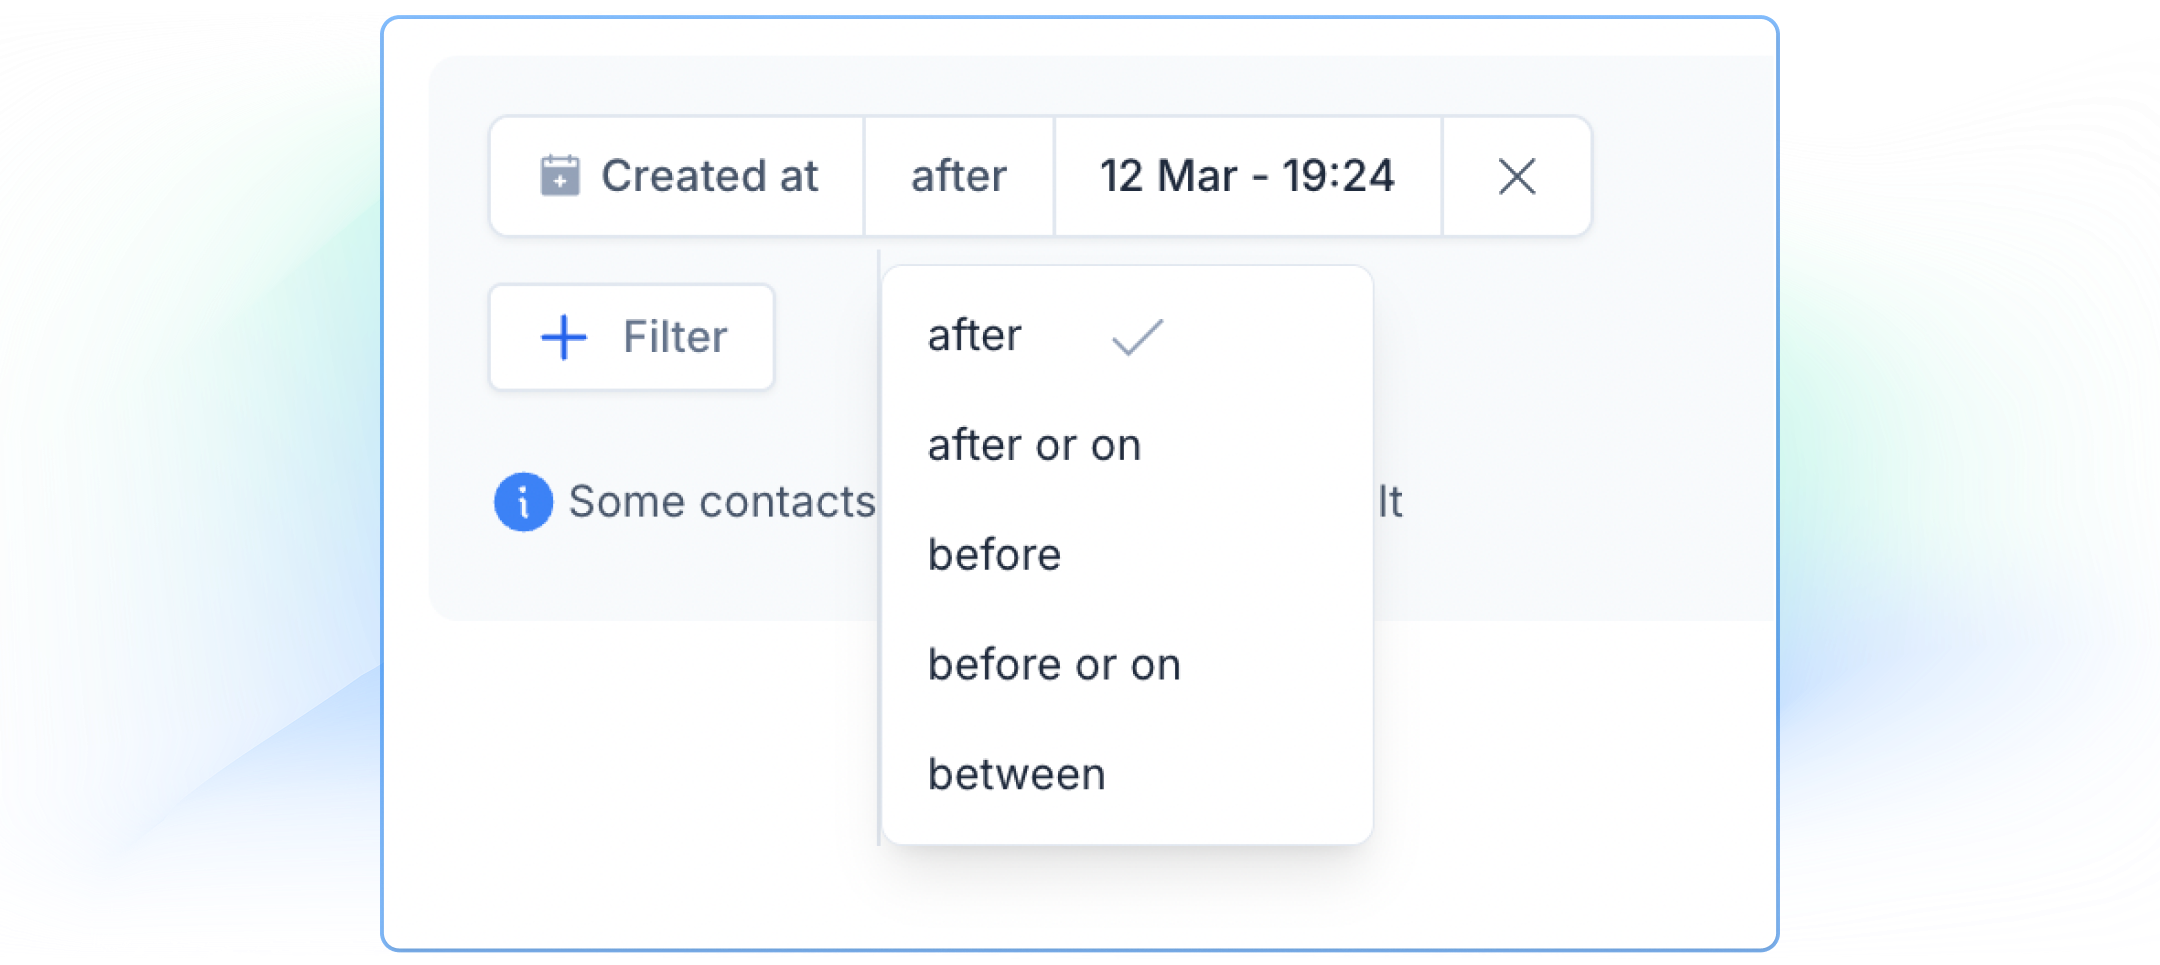
Audience
To define your campaign audience, you can either import a CSV file or apply contact filters. For CSV imports, upload a file that includes phone numbers with country codes. The file may only contain the following three columns: “email”, “name”, and “phone”. To upload your file, click Upload CSV and select the file from your device.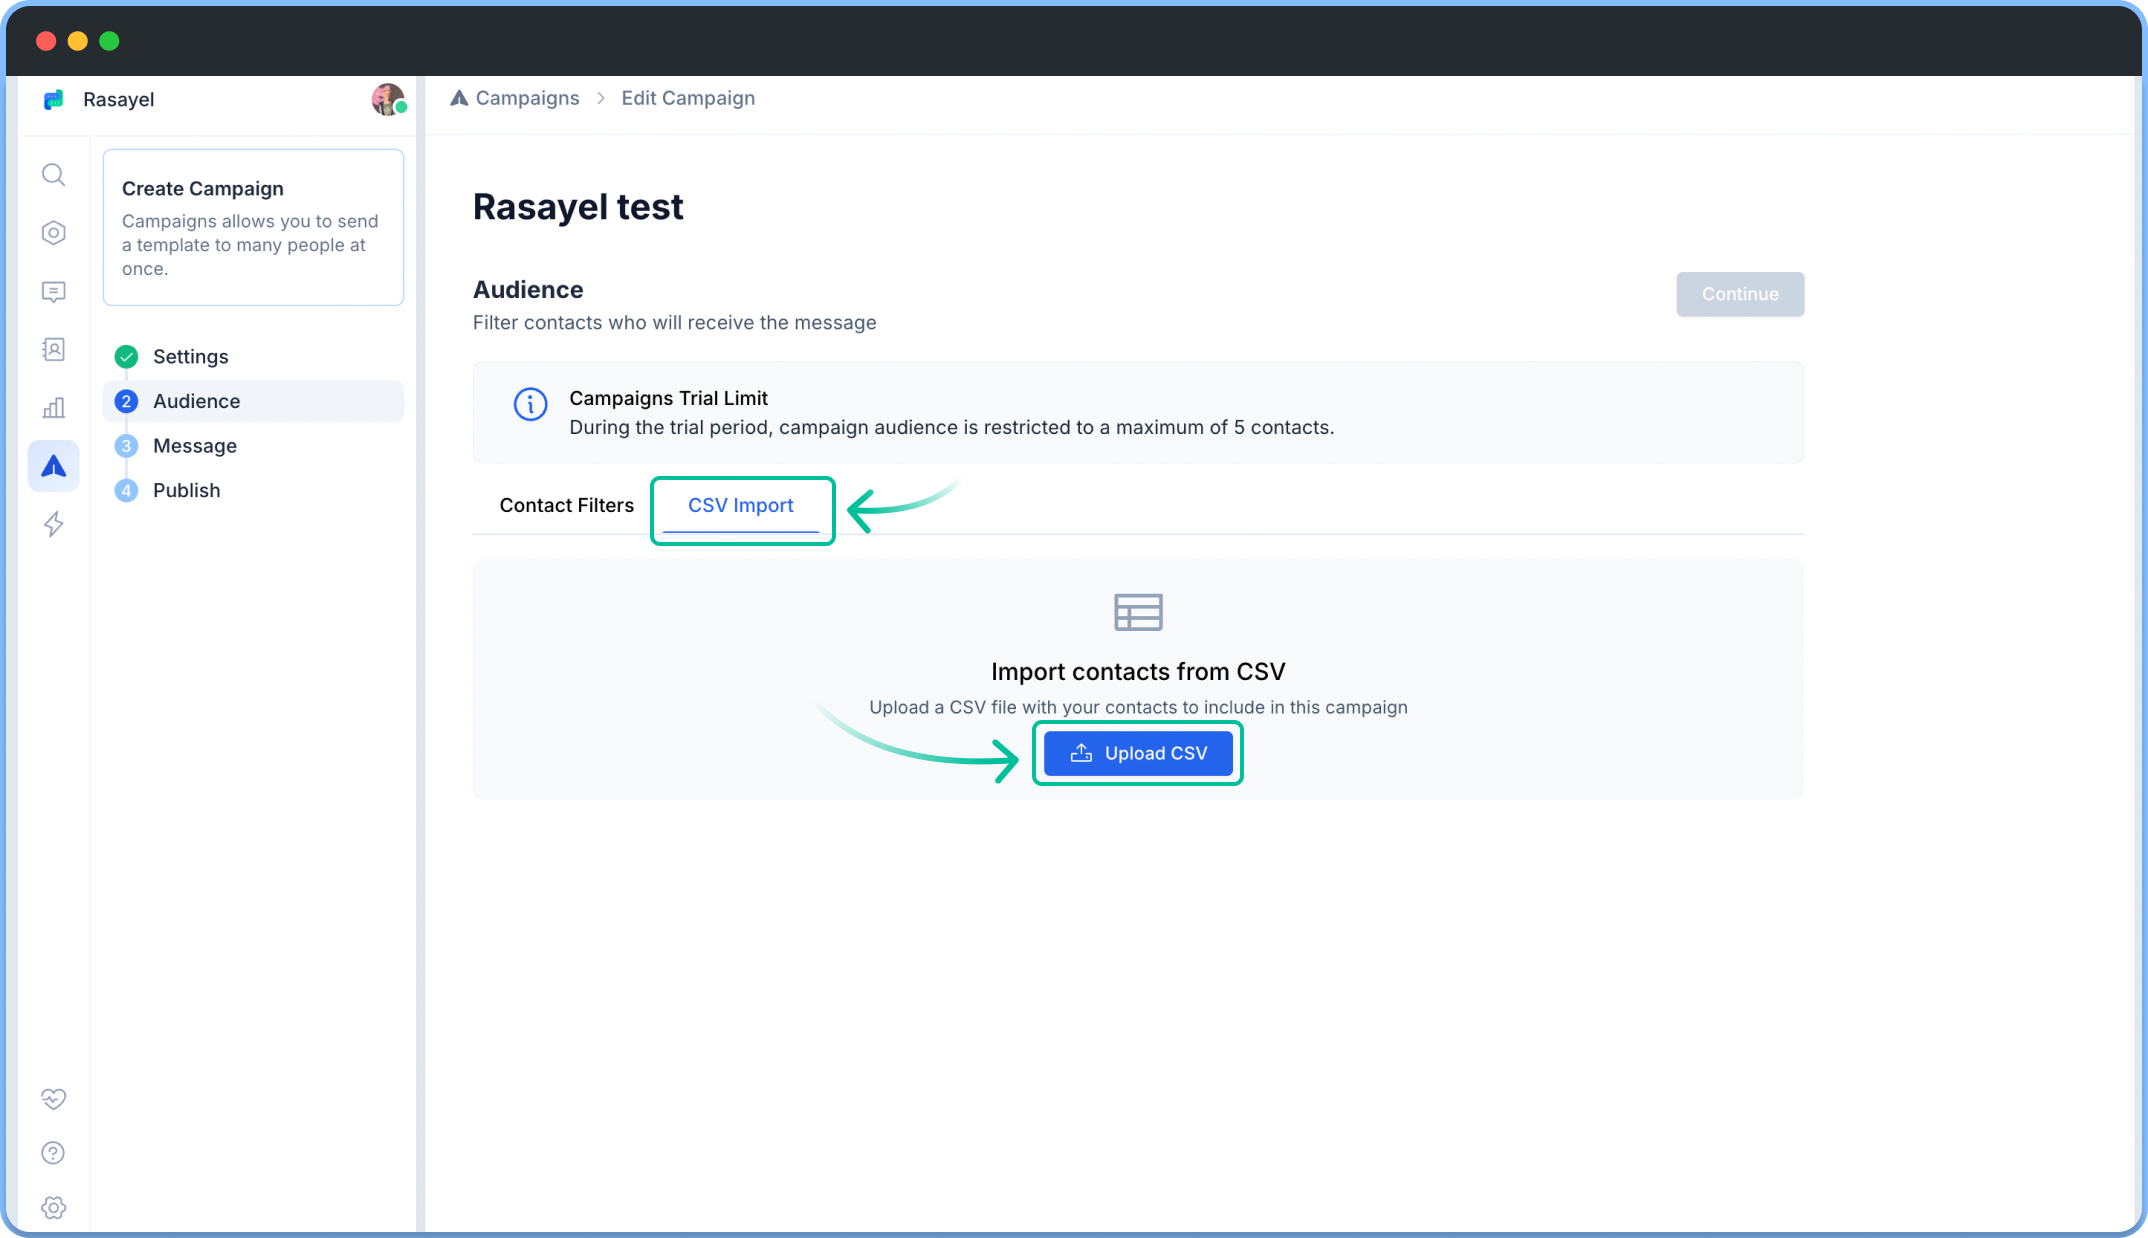
- standard and custom properties
- tags
- contact creation date
- HubSpot contact import lists

Message
Campaigns can only be sent with one of your pre-approved templates.- Choose a template from a list (or create a new one), then click on Use selected template.
- Fill in the text variables and upload files to the media header, if needed.
- Fill the variable directly, which will be applied in the same manner to every message sent.
- Replaces variables automatically with Rasayel properties (e.g. “user display name”). In this case, you will be prompted to fill in a fallback value (e.g., “dear customer”). This fallback will be used if the user does not have this property value filled in.