Skip to main contentTeams is a feature that allows you to group users together for easier collaboration. You can control visibility for each user, so that only the relevant team members can see the information they need. This makes it easier to manage large projects and keep track of progress. You can add and remove team members as needed, and adjust their visibility settings to ensure that everyone has access to the information they need to get the job done.
Inboxes
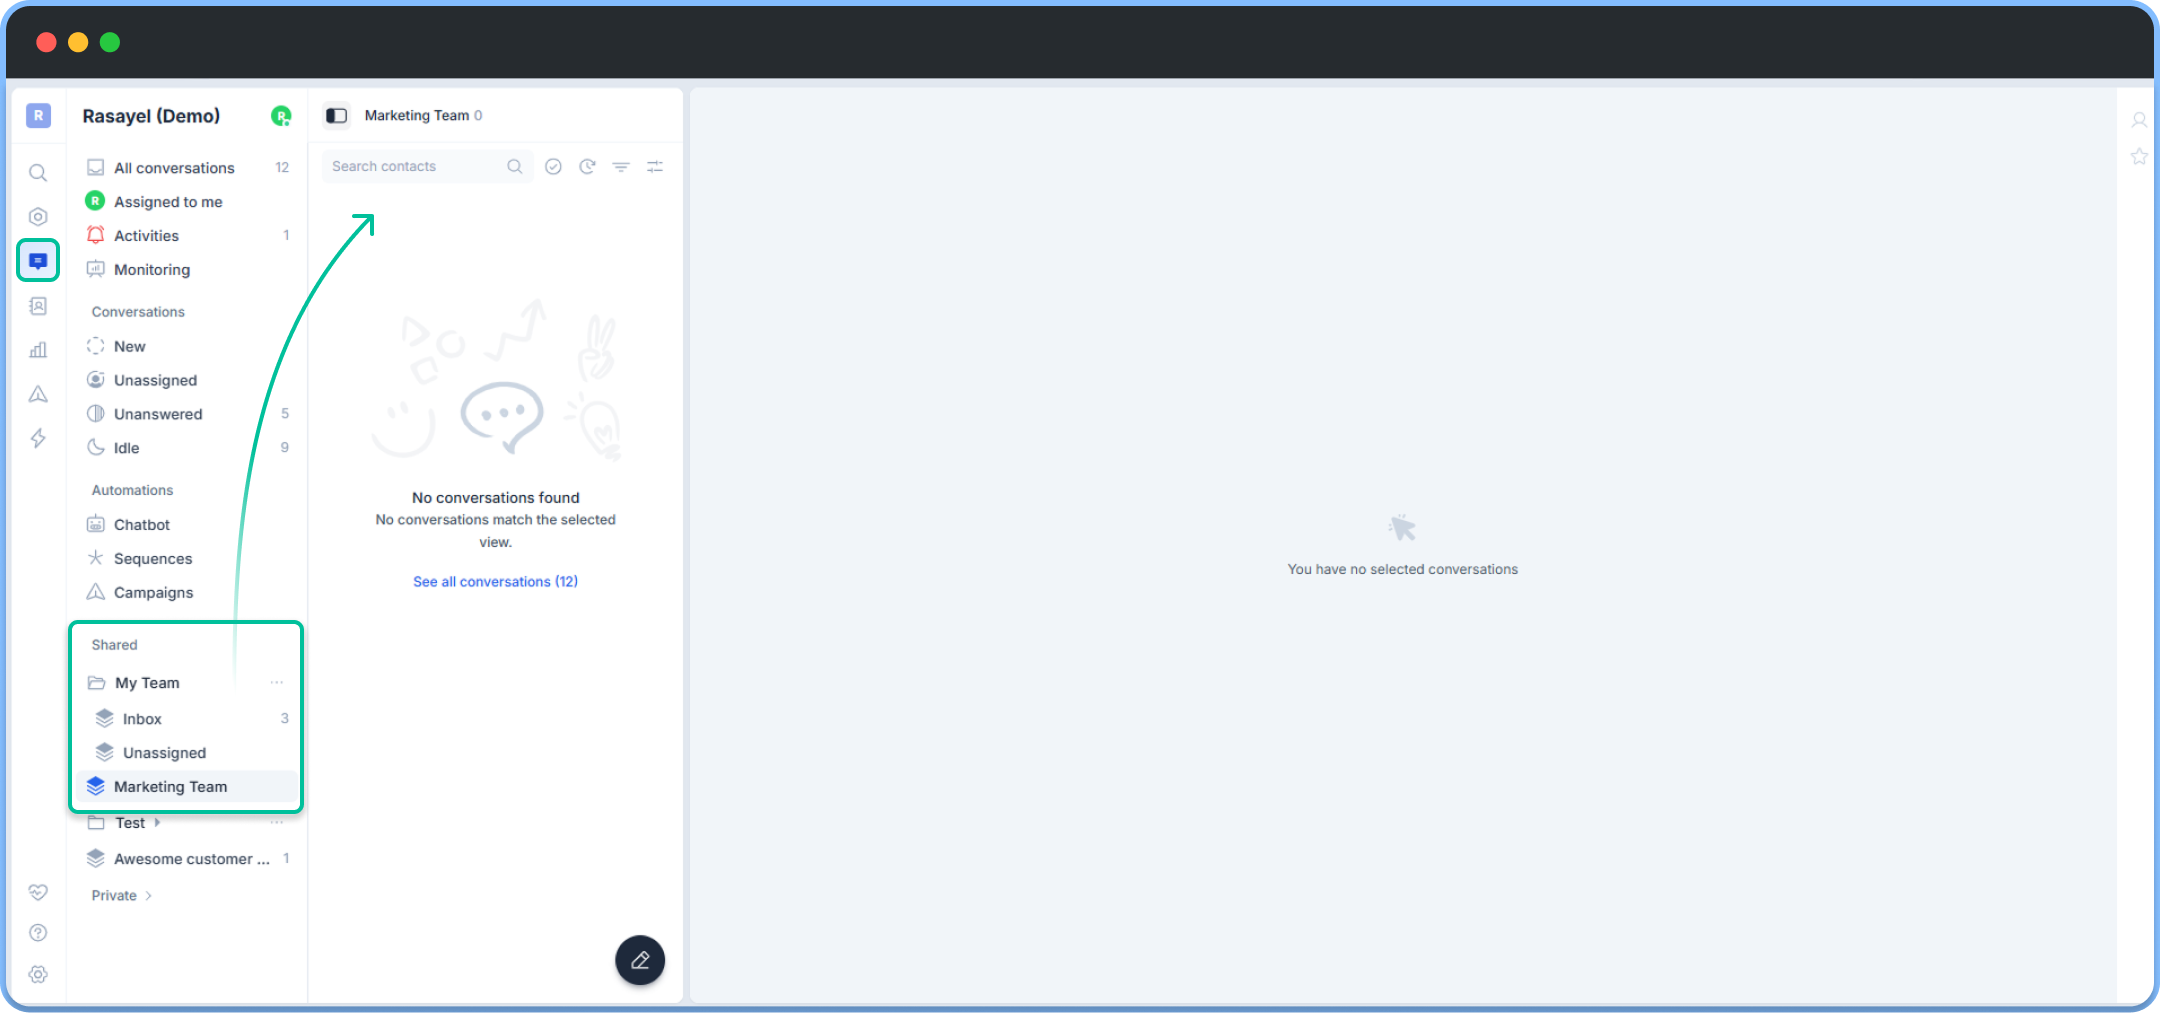
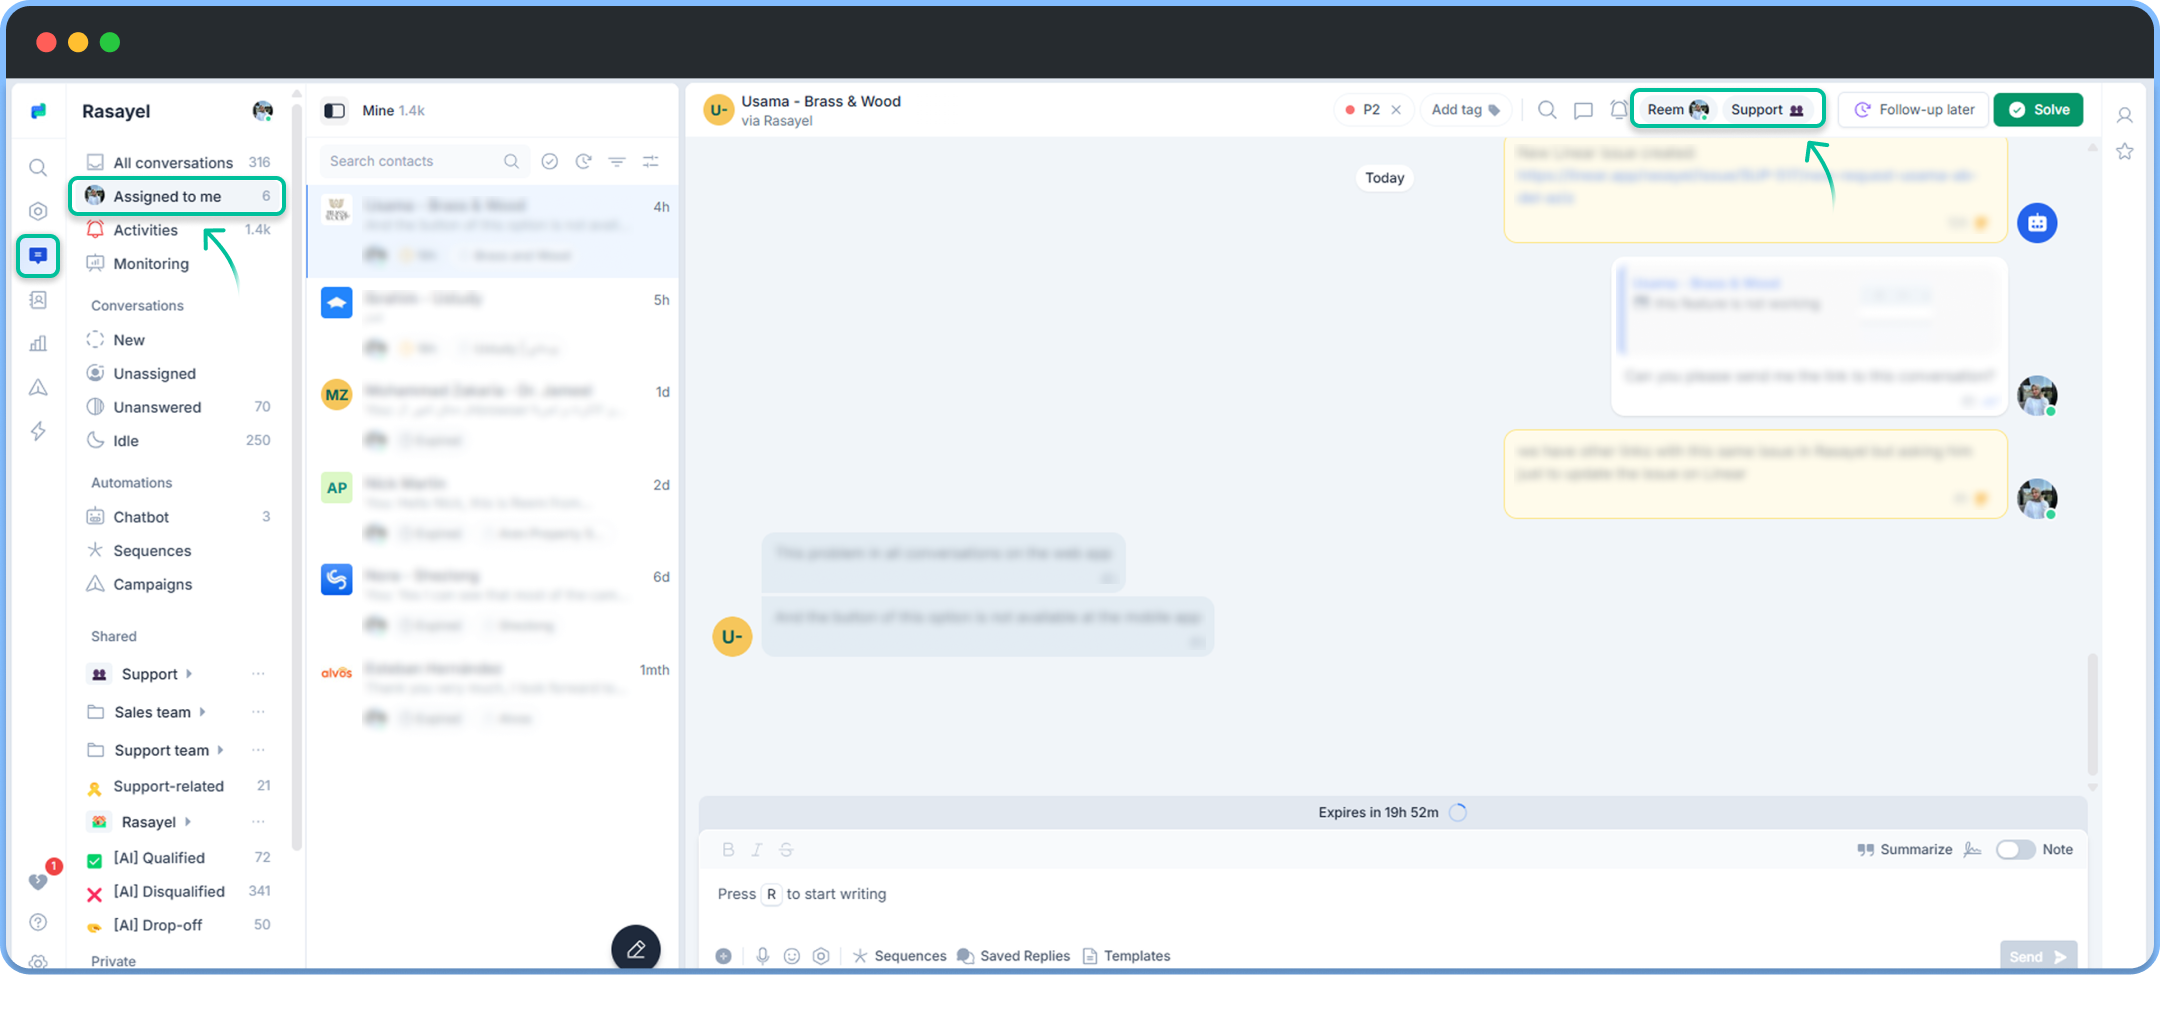
To create a team go to Settings > Teams > Create a new tream. Give your team a name. After creating a team, you will be able to see a shared workspace with its own dedicated inbox. By navigating to left column of Rasayel in your general workspace, you will be able to access your team’s inbox and unassigned conversations under Shared > My team. No need to create this folder, it will be created on its own. That way, you can ensure team transparency, higher response rate, and better visibility over each team.
Adding Users
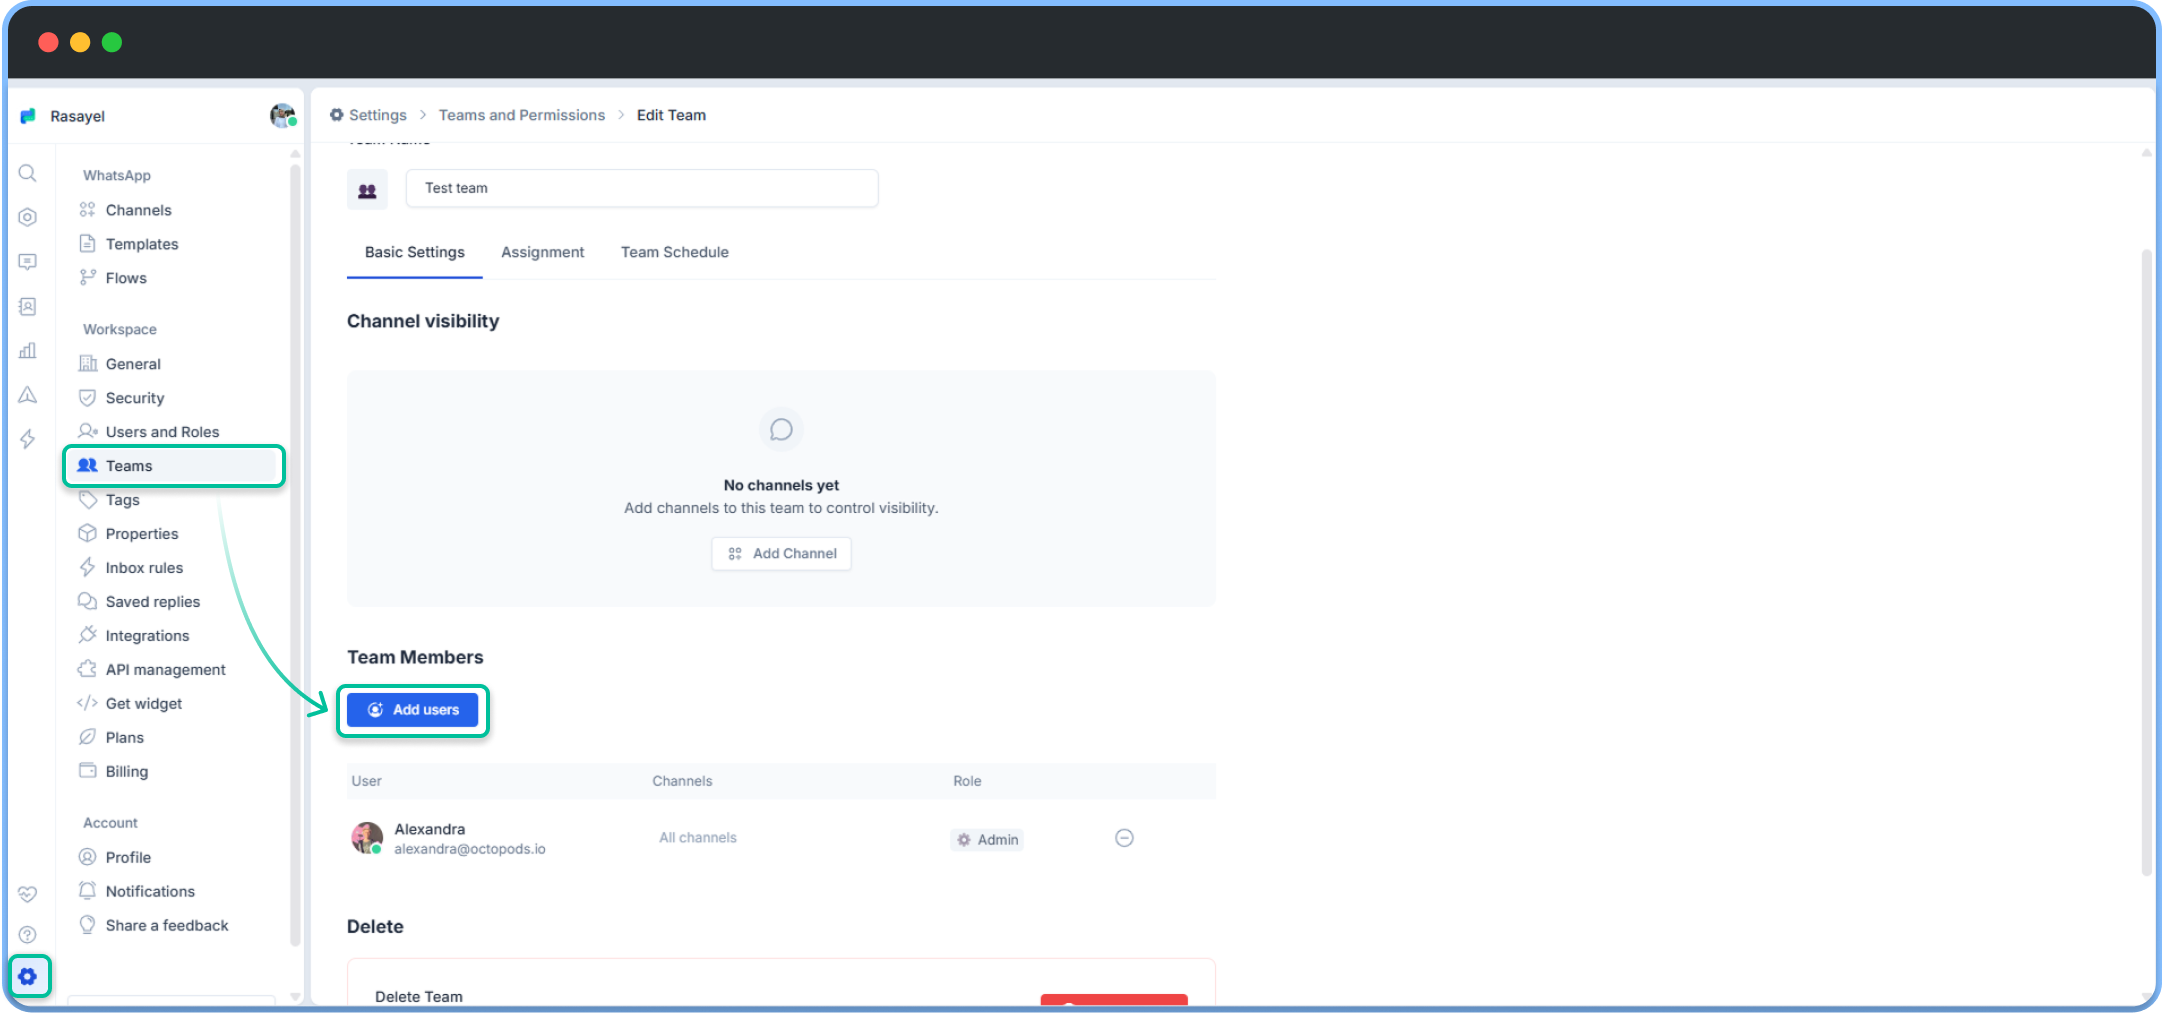
When a user is added to a team, they will have access to all of the channels that are associated with that team. However, team members can also be restricted from viewing certain channels within the team. This allows team administrators to control the information that each team member has access to, and to ensure that sensitive data is only visible to those who need to see it. By carefully managing channel visibility, teams can work more efficiently and effectively, without sacrificing security or privacy.
To add a user to a team, go to Settings > Teams** > choose a team > add users**
Teams channels
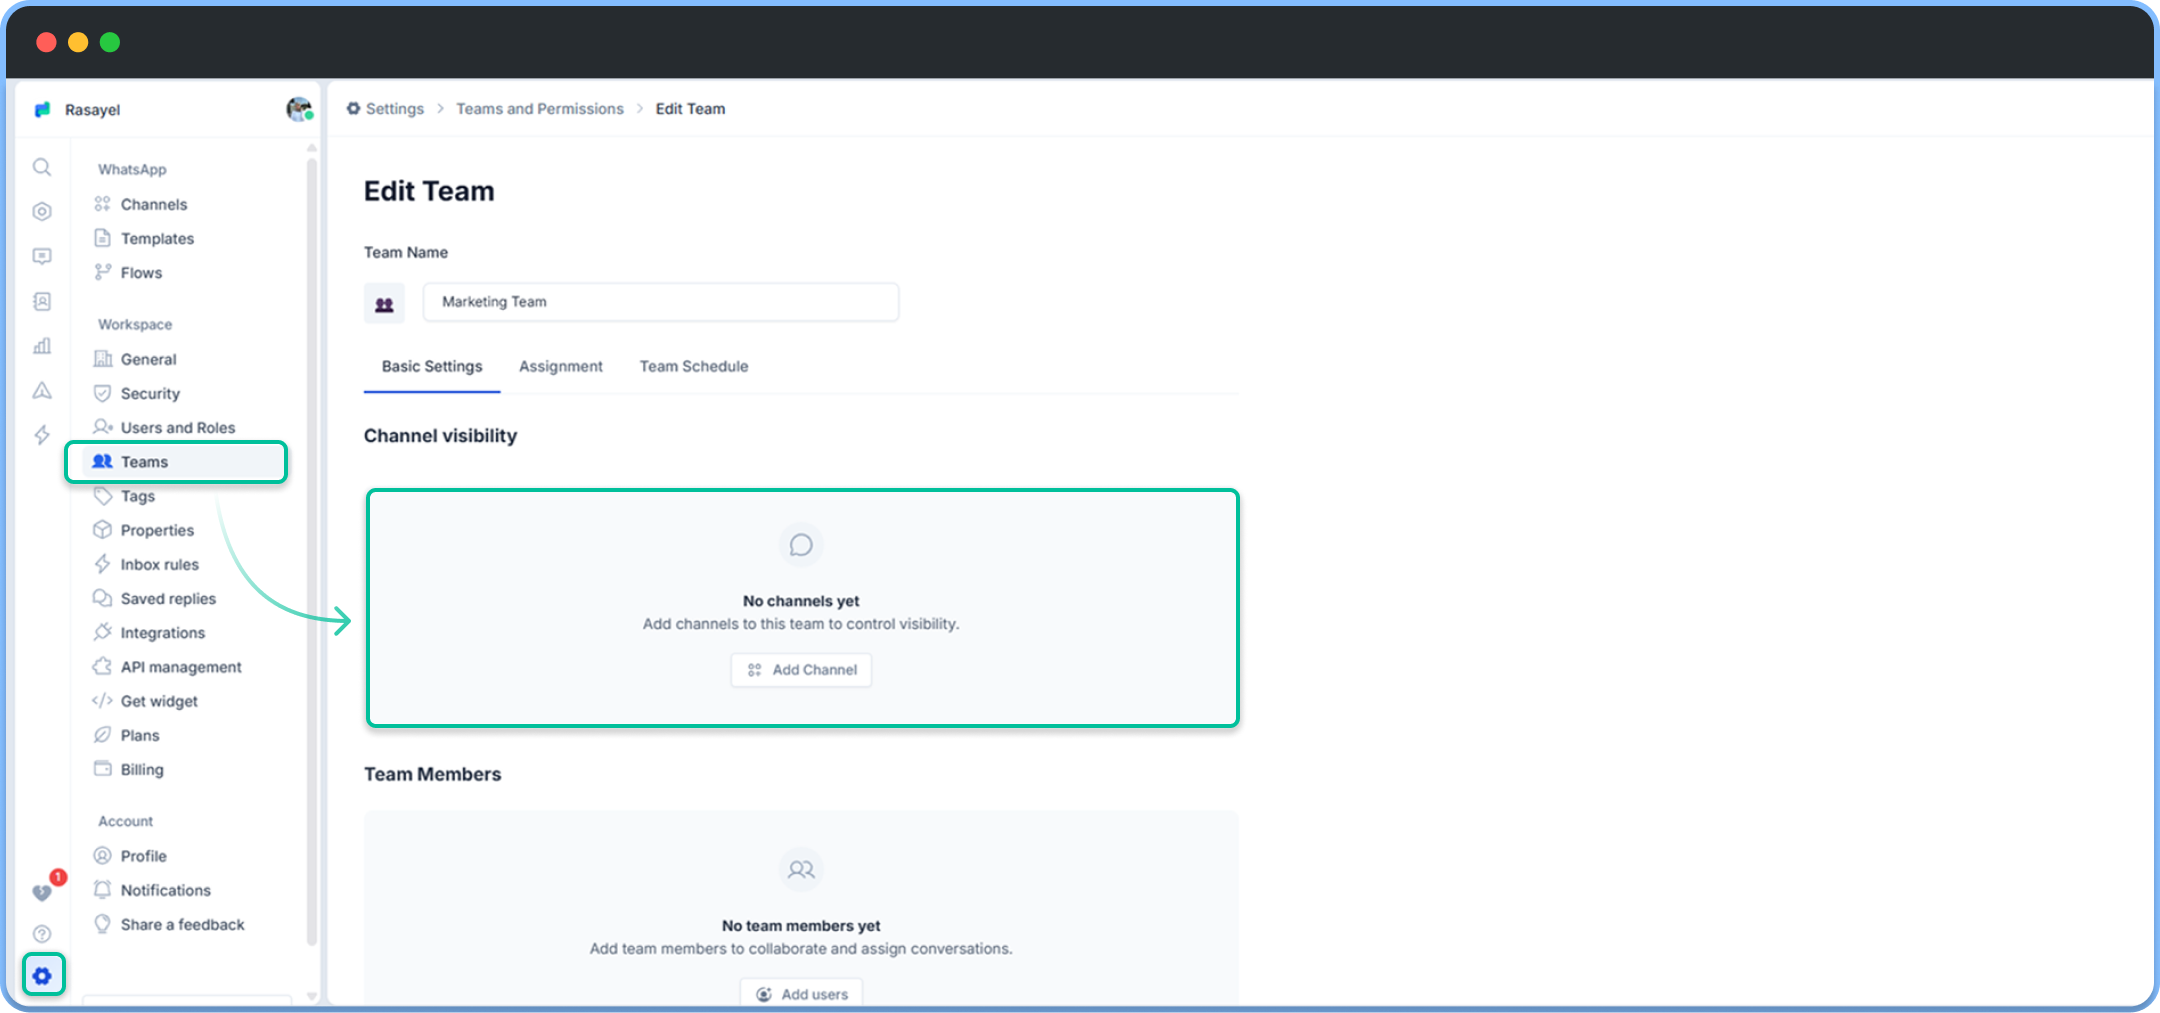
When setting up a team in Rasayel, you can link a specific WhatsApp channel to that team. This helps ensure that the right team members handle the right conversations, and that all incoming messages are properly organized and categorized.
Team assignment
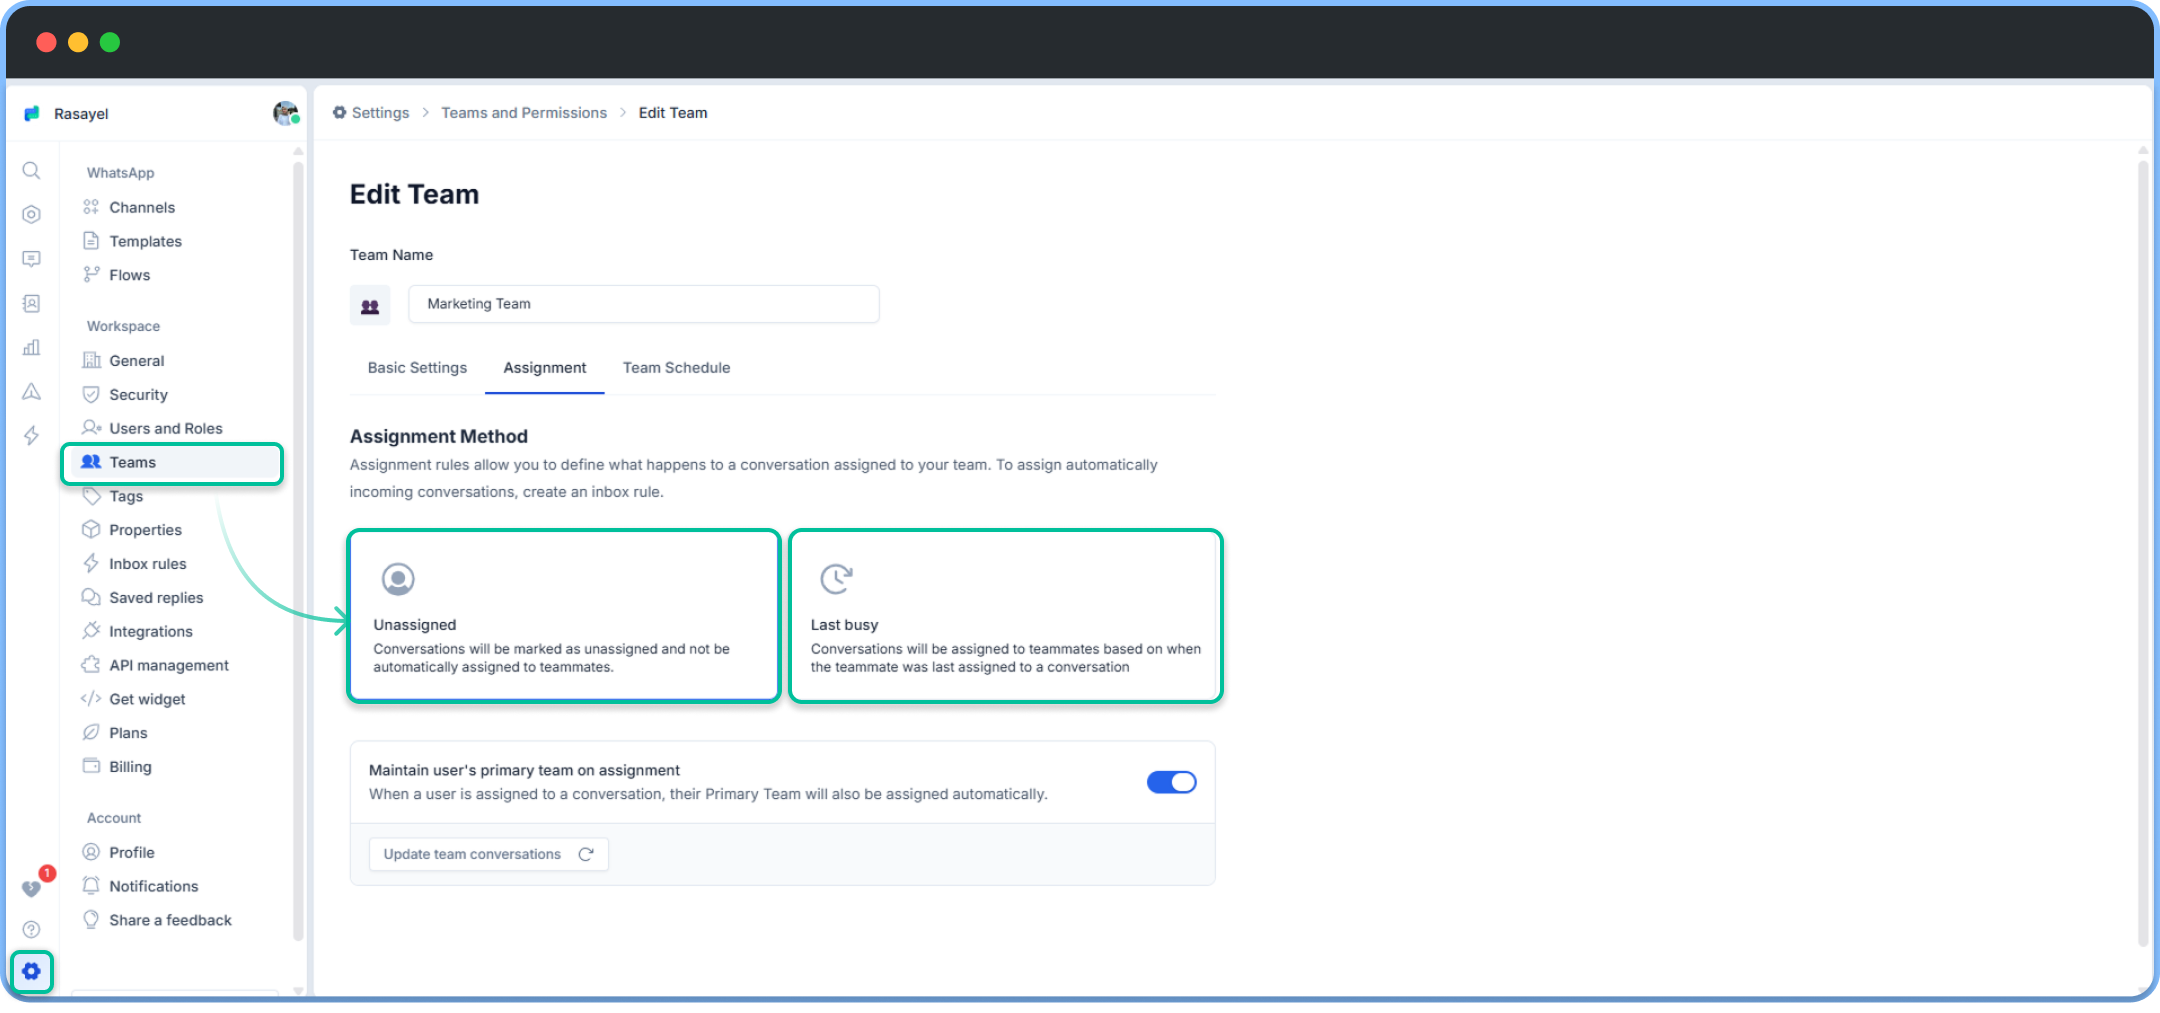
Each Team has its own assignment options, which can be set in the Assignment section. Currently, there are two options: Unassigned and Last busy.
If the team’s assignment option is set to Unassigned, any conversation assigned to the team will be marked as unassigned and need to be manually picked up by a team member.
If the team’s assignment option is set to Last busy, any conversation that is assigned to the team will be automatically assigned to teammates based on when the teammate was last assigned to a conversation.
Team conversations
Each team will have its own conversations; the assigned team and member will show on every individual conversation. This makes it easier for members to identify conversations and their associated information such as tags, properties, and contact information that may be stored in your CRM.
Team schedule
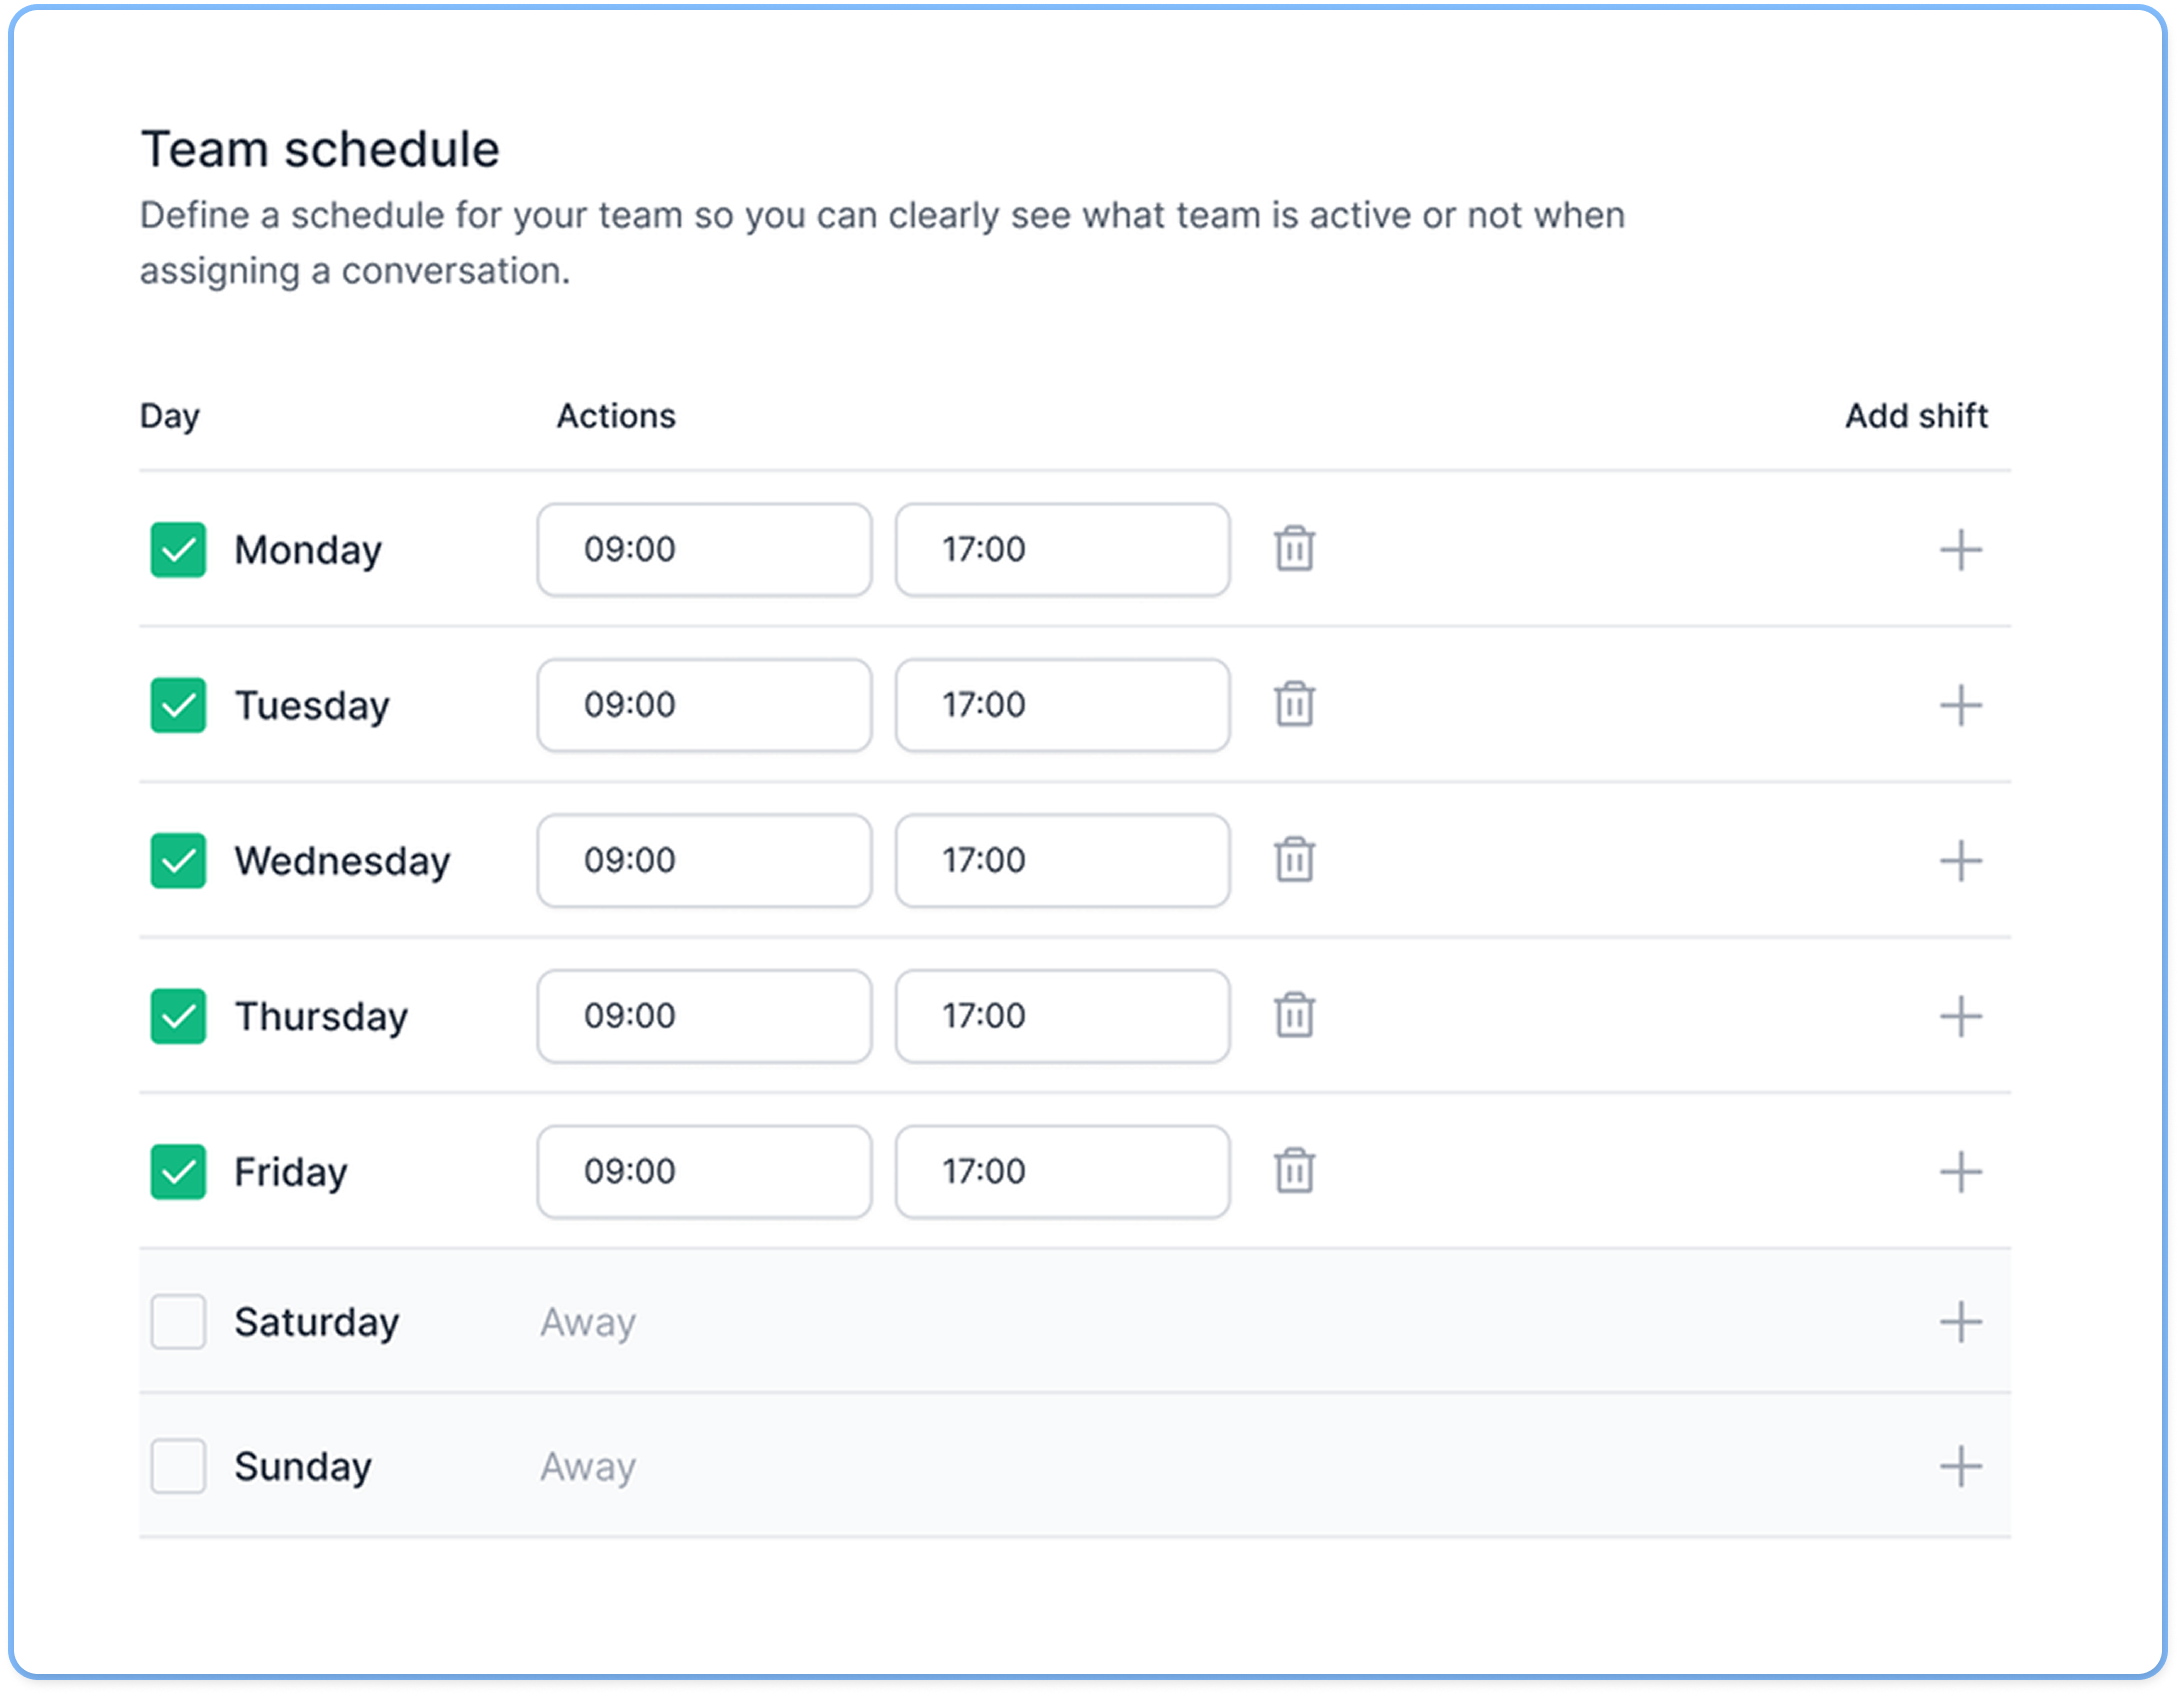 Teams can also set their own schedules. This allows teams to indicate their availability and office hours based on their time zone, making it easier for teams to coordinate and collaborate across different time zones, and ensures that team members are aware of each other’s availability.
When team members mark themselves as “away,” they won’t be assigned new conversations. However, if a team member is the only one in a certain team and an incoming conversation is assigned based on a rule that includes that team, they’ll still be assigned to that conversation, even if marked as “away.”
To modify a team’s schedule, follow these steps:
- Go to the Team Schedule section.
- Un-check the non working days to indicate that the team is out of office in those days
- Add shifts for working days by clicking on the
+ button. (You can also add multiple shifts in the same day).
- Change the starting and ending time of each day as you wish.
- Click Save to save your changes.


 Teams can also set their own schedules. This allows teams to indicate their availability and office hours based on their time zone, making it easier for teams to coordinate and collaborate across different time zones, and ensures that team members are aware of each other’s availability.
When team members mark themselves as “away,” they won’t be assigned new conversations. However, if a team member is the only one in a certain team and an incoming conversation is assigned based on a rule that includes that team, they’ll still be assigned to that conversation, even if marked as “away.”
To modify a team’s schedule, follow these steps:

